Nail trimming is the grooming job dogs and owners dread most, and it’s usually the fear, not the difficulty, that gets in the way. The actual mechanics are simple once you understand one piece of anatomy.
That piece is the quick, the living part inside the nail, and respecting it is the whole game. Avoid it and trims are quick and painless, hit it and you get the yelp and the blood that scare everyone off.
This guide walks through the tools, the technique, the trick for black nails, and how to win over a dog who hates having its feet touched. Done right, the whole routine takes a couple of minutes.
Why Nail Trims Actually Matter
It’s tempting to treat nail length as cosmetic, but overgrown nails genuinely hurt. When nails get long enough to hit the ground, every step pushes them back into the nail bed, which is painful and over time deforms the toes.
Long nails also change how a dog stands. They force the paw into an unnatural posture that stresses the joints and can lead to splayed feet and strain up the legs.
Left long enough, nails curl and grow into the paw pad, a painful and easily infected mess. The dewclaws are especially prone to this, since they never touch the ground to wear down.
So a regular trim isn’t pampering. It’s basic comfort and mobility, the same category of care as a regular bath and a managed coat.
Understanding the Quick
Inside every nail runs the quick, a bundle of blood vessels and nerves that supplies the nail. It’s why cutting too far both bleeds and hurts.
On light or clear nails, the quick is easy to spot as the pink region inside the nail. You aim to cut the clear or white tip beyond where the pink ends, leaving a small margin.
On dark nails, the quick is hidden, which is where most of the anxiety comes from. The solution is to cut conservatively and read the cut surface, covered in its own section below.
One helpful fact: the more regularly you trim, the more the quick recedes from the tip. Dogs trimmed often have short quicks and lots of safe nail to remove, while neglected nails have long quicks that leave little room.
How Often to Trim
A good rule of thumb is every three to four weeks for most dogs, but the dog tells you better than the calendar. The classic signal is sound.
If you hear nails clicking on hard floors or see them touching the ground when your dog stands, they’re too long. Nails should clear the floor when a dog is standing normally.
Activity matters too. Dogs that walk a lot on pavement wear their nails down naturally and need fewer trims, while couch-dwelling and senior dogs need them more often.
Don’t let trims lapse for months. Frequent small trims are easier, safer, and far less stressful than occasional major ones, because the quick stays short.
Clippers vs Grinders
You have two main tools, and neither is universally better. Clippers cut the nail in one motion, while a grinder (a rotary tool with a sanding band) files the nail down gradually.
Clippers are fast, quiet, and cheap, which suits most dogs and most owners. The two common styles are scissor-type, good for most nails, and guillotine-type, which some people find simpler on small to medium dogs.
Grinders give more control near the quick and leave smooth, rounded edges with no sharp corners. The trade-offs are noise, vibration, and time, plus the need to keep fur away from the spinning band.
A lot of owners use both: clippers to remove the bulk, then a quick grind to smooth the tips. Whichever you choose, let a nervous dog get used to the tool before it ever touches a nail.
What You’ll Need
Keep the kit simple. You need a sharp, appropriately sized pair of dog nail clippers or a grinder, plenty of high-value treats, and good lighting so you can see what you’re doing.
The one item people forget is the most important: styptic powder. It stops bleeding fast if you nick the quick, and cornstarch or a styptic pencil works in a pinch.
Have everything within reach before you start. Fumbling for supplies mid-trim with a nail bleeding and a dog squirming is exactly the stress you’re trying to avoid.
Step by Step With Clippers
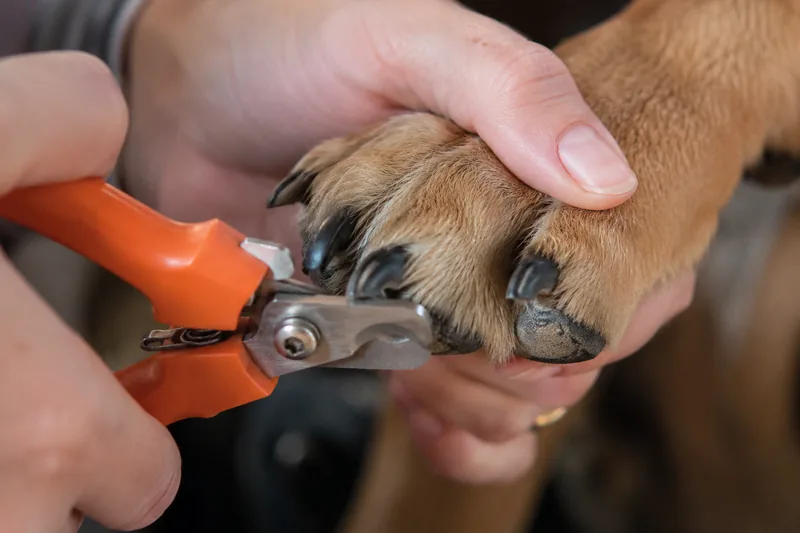
Pick a calm moment and a comfortable position, ideally with your dog relaxed and the paw well lit. Hold the paw gently but securely, and press lightly to extend each nail.
Position the clippers near the tip, cutting from underneath toward the end at roughly a 45-degree angle. Stay well clear of the quick, taking only the hooked end on your first pass.
Cut one nail, then reward immediately. This pairing of trim and treat is what builds a dog who tolerates the whole routine over time.
Work through the nails at a pace your dog accepts, even if that means only a few per session. There’s no rule that says all the nails must be done at once, and splitting it across days is perfectly fine.
Trimming Black Nails
Black nails intimidate people because the quick is invisible, but the method is reliable. Instead of guessing, you read the nail as you go.
Shave off thin slices from the tip rather than one big cut. After each slice, look at the freshly cut surface end-on.
A pale, chalky, or white center means you have room, so take another thin slice. When a small dark dot or a pinkish circle appears in the middle of the cut surface, stop, because that’s the leading edge of the quick.
Patience is everything here. Thin slices and frequent checks make black nails just as safe as clear ones, while a single deep cut is how the quick gets hit.
Using a Grinder
If you go the grinder route, introduce it slowly, letting your dog hear and feel it running before you grind a single nail. Treats during this intro do a lot of work.
Hold the paw securely and touch the grinder to the nail in short bursts, a second or two at a time, rather than holding it against the nail continuously. Move steadily and let the tool do the work without pressure.
Keep long fur and floppy ears well away from the spinning head, since hair can wrap and tug painfully. Tying back the paw fur or feeding each toe through a sock with a hole works well.
Grind a little off each nail and round the edges, checking frequently for the same dark dot that signals the quick. The gradual nature of grinding makes it forgiving, which is exactly why nervous owners often prefer it.
Don’t Forget the Dewclaws
The dewclaws are the nails higher up on the inner leg that don’t touch the ground. Because nothing wears them down, they grow fastest and curl into the leg if ignored.
Check for them on the front legs and, in some dogs, the back legs too. Some dogs have double dewclaws, so look carefully.
Trim them with the same care as the rest. An overgrown dewclaw curling into the skin is a common and painful problem that a quick check prevents.
If You Cut the Quick
It happens to almost everyone eventually, and it looks scarier than it is. The nail bleeds, your dog may yelp, and both of you get a fright, but it’s rarely serious.
Stay calm and apply styptic powder to the tip, pressing gently for a few seconds. Cornstarch or a bar of soap pressed into the nail works if you have nothing else.
Keep your dog still and the paw clean until the bleeding stops, which is usually quick. Offer a treat and end the session on a positive note rather than pushing on.
The lasting harm is usually to trust, not the toe. One bad cut can make a dog wary of trims, so the priority afterward is rebuilding the good associations.
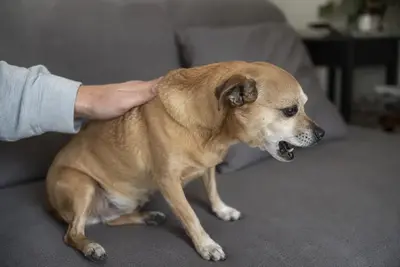
The Nervous or Uncooperative Dog
For a dog that panics at the sight of clippers, forcing the issue backfires every time. The path forward is desensitization, building tolerance in small, rewarded steps.
Start by simply touching the paws during cuddle time and rewarding calm. Over days, progress to holding a paw, then showing the clippers, then touching the clippers to a nail without cutting, treating at every stage.
When you finally cut, do one nail and stop, no matter how well it goes. Ending early and happy teaches your dog that trims are brief and rewarding, the opposite of the marathon they fear.
This patience also overlaps with general paw sensitivity, the same nervous handling behind a lot of paw fussing. A dog comfortable having its feet handled is easier in every grooming task, from baths to toothbrushing.
When to Call a Pro
There’s no shame in outsourcing this one. If your dog is genuinely aggressive about its feet, if the nails are severely overgrown, or if you’re too anxious to cut safely, a groomer or vet tech handles it routinely.
Severely overgrown nails sometimes need a vet anyway. When the quick has grown very long, a vet can advise on shortening them safely, occasionally under sedation for badly neglected feet.
A professional visit is also a good learning chance. Watching a groomer work, and asking them to show you where to cut on your dog specifically, can turn a dreaded chore into something you manage at home.
Final Thoughts
Nail trimming earns its scary reputation only when it’s rushed or rare. Understand the quick, trim little and often, and keep styptic powder within reach, and the whole thing shrinks to a calm two-minute routine.
The black-nail trick, thin slices and a look at the cut surface, removes most of the remaining fear. And for the dog who hates it, slow desensitization beats brute force every single time.
Healthy, short nails are worth the effort. They keep your dog comfortable, protect the joints, and prevent the painful curl-in that neglected nails always lead to.
Frequently Asked Questions
Aim to cut at roughly a 45-degree angle, following the natural curve of the nail, with the clippers coming from underneath toward the tip. Cut across the nail rather than side to side. The goal is to take off the hooked end without crushing the nail, so sharp clippers held perpendicular to the nail work best.
When nails are overgrown, the quick has usually grown out with them, so you can't shorten them all at once. Trim a small amount every week or two, and the quick gradually recedes, letting you take a bit more each time. Over several weeks the nails return to a healthy length without hitting the quick.
Both work, and it comes down to your dog and your comfort. Clippers are fast and quiet, while a grinder smooths edges and gives more control near the quick but makes noise and takes longer. Many owners clip the bulk and grind to round the tips, and nervous dogs often tolerate one method far better than the other.
You can't see it from the outside, so go by the cut surface instead. Shave off thin slices, and after each one look at the freshly cut end: pale and chalky means keep going, and a small dark or pink dot appearing in the center means stop, because the quick is just beyond it.
Slow desensitization is the fix. Spend days just touching the paws and rewarding, then introduce the clippers without cutting, then do a single nail and stop. Pair every step with high-value treats, keep sessions short, and never force a panicking dog, which only deepens the fear. A grinder or a groomer may suit some dogs better.