Cleaning a dog’s ears is one of those tasks that sounds fussy and turns out to be simple. Two minutes, the right solution, and a tolerance for a wet head shake are most of what it takes.
It’s also worth getting right. Done well, ear cleaning clears out the wax and moisture that breed infections, and done badly, it pushes debris deeper or irritates the canal into the very problem you were trying to avoid.
This guide walks through exactly what to use, the step-by-step method, the short list of things to never put in an ear, and how often healthy ears actually need attention.
Why Ear Cleaning Matters
A dog’s ear canal is built in an L shape, dropping down and then turning inward toward the eardrum. That bend traps wax, moisture, and dirt in a warm, dark space, which is a near-perfect setup for yeast and bacteria.
Routine cleaning clears that buildup before it turns into trouble. It removes excess wax, flushes out debris, and dries the canal, all of which make infection less likely.
Cleaning also doubles as an inspection. Every time you clean, you get a look and a sniff inside the ear, which is how a lot of owners catch a brewing ear infection early.
Does Your Dog Even Need It?
Here’s the part most guides skip: a healthy ear that looks clean and smells normal doesn’t need routine cleaning at all. Over-cleaning is a real problem, not a virtue.
A normal dog ear is pale pink, nearly odorless, and carries only a light film of wax. If that’s what you see, leave it alone and just keep checking.
Cleaning earns its place when wax is visibly building up, after your dog swims or gets bathed, or in breeds and individuals prone to ear trouble. The goal is to clean as needed, not on autopilot.
What You’ll Need
Keep the kit short and dog-specific. You need a veterinary ear-cleaning solution formulated for dogs, a handful of cotton balls or gauze squares, and a towel for the inevitable shake.
A good dog ear cleaner does three jobs: it breaks down wax, flushes debris, and contains a drying agent so the canal isn’t left damp. Your vet can recommend one suited to your dog, especially if allergies or frequent infections are in the picture.
Treats belong in the kit too. A few rewards turn ear cleaning from a wrestling match into a routine your dog tolerates, which matters more than any product.
What to Never Use
The don’t list is short and important. Never use cotton swabs inside the canal, where they push debris toward the eardrum and risk real damage.
Skip the home remedies that the internet loves. Hydrogen peroxide, rubbing alcohol, and vinegar all sting inflamed skin, and they leave moisture or irritation behind rather than the dry, clean canal you want.
Don’t reach for a cleaner the moment an ear looks angry, either. A red, swollen, painful, or foul-smelling ear may have a ruptured eardrum or an active infection, and pouring solution into it can do harm.
That ear needs a vet first.
Step by Step: Cleaning the Ears
Set up somewhere easy to wipe down, because this gets messy. Have your solution open, cotton balls within reach, and your dog calm, ideally after a walk.
First, fill the canal. Lift the ear flap, hold the solution bottle just above the opening without touching it, and squeeze in enough cleaner to fill the canal.
It looks like a lot, and that’s correct.
Next, massage the base. Gently rub the firm base of the ear, below the opening, for about twenty to thirty seconds.
You’ll hear a satisfying squelch as the solution breaks the debris loose down in the canal.
Now let your dog shake. Step back and let the head shake fling the loosened gunk and excess fluid up out of the canal, which is the part the dog does better than you ever could.
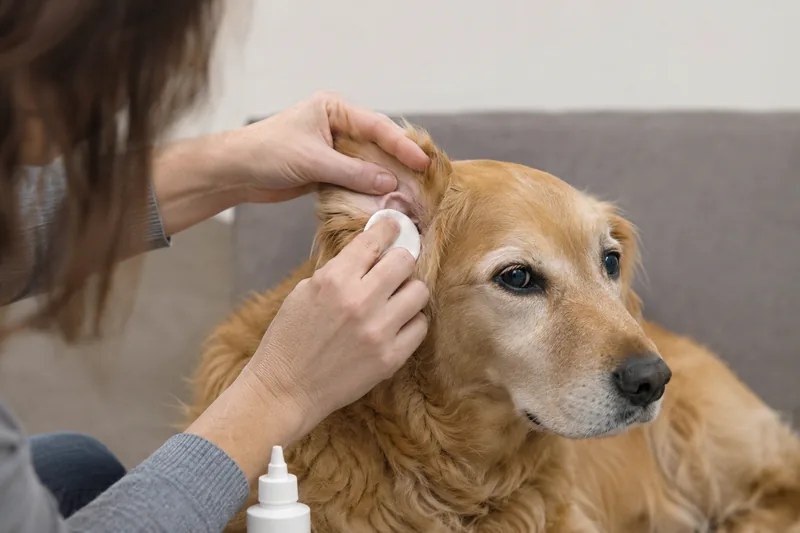
Finally, wipe. Use a cotton ball or gauze to clear the loosened debris and fluid from the outer canal and the folds of the ear flap, going only as deep as a finger fits comfortably.
Repeat on the same ear if the cotton comes away dirty, then do the other side. For most ears, one or two rounds per side is plenty, and you finish with a treat and a towel.
How Often to Clean
There’s no universal schedule, and that’s the honest answer. Frequency depends entirely on the individual dog and the state of the ear.
Many healthy dogs need cleaning only every few weeks to once a month, and some upright-eared breeds with dry, clean canals need it only rarely. The ear itself tells you when.
Dogs with more wax, floppy ears, allergies, or a swimming habit may need weekly cleaning or whatever rhythm your vet sets. If you’re treating an active infection, follow the vet’s specific instructions instead of this general guidance.
The key is to avoid the over-cleaning trap. Scrubbing a healthy ear too often strips its natural protection and can irritate the canal into producing more wax or becoming inflamed.
Dogs That Need Extra Attention
Some dogs are simply built for ear maintenance. Floppy-eared breeds like cocker spaniels, basset hounds, and many retrievers trap heat and moisture under the flap, which raises the cleaning workload.
Water dogs and frequent swimmers need a routine too. Moisture left in the canal after swimming or a bath is a leading cause of ear infections, so drying and cleaning after water time pays off.
Allergic dogs are the other big group. Allergies inflame the ear’s skin from the inside, which is why dogs with skin problems so often battle recurring ear issues and need more frequent care.
When Cleaning Isn’t the Answer
Cleaning prevents problems, but it doesn’t cure them, and knowing the difference saves your dog a lot of misery. Some ears need a vet, not a bottle of cleaner.
Watch for the red flags: a strong or foul odor, brown, yellow, or black discharge, redness and swelling, pain when you touch the ear, or constant head shaking and scratching. Those point to infection rather than ordinary dirt.
Dark, crumbly, coffee-ground debris with intense itching is its own signal. That pattern often means ear mites, which need a specific treatment that no amount of cleaning will replace.
If you see any of that, stop cleaning and book a visit. Flushing an infected or mite-ridden ear can spread the problem or mask the signs your vet needs to see.
Making It a Stress-Free Routine
The dogs who hate ear cleaning are usually the ones who got surprised by it once. A little conditioning goes a long way toward a lifetime of easy ears.
Start slow with handling. Touch the ears, reward, lift the flap, reward, and only then introduce the solution, so each step feels normal before the next arrives.
Keep sessions short and end on a good note. Treats during and after, a calm voice, and stopping before your dog gets fed up all build the cooperation that makes the actual cleaning easy.
Puppies who learn early that ear handling means treats grow into adults who barely flinch. It’s worth the few minutes of training now.
Final Thoughts
Ear cleaning is a small habit with an outsized payoff. A clean, dry canal is a poor home for the yeast and bacteria behind most ear infections, and the two-minute routine catches problems while they’re still small.
The whole method comes down to a few rules: use a real dog ear cleaner, fill and massage and let the shake do the work, wipe only what you can reach, and never push a swab into the canal. Clean when the ear needs it, not on a rigid clock.
And know when to put the bottle down. A smelly, painful, or gunky ear is a vet visit, not a cleaning job, and recognizing that line is the most useful thing in this whole guide.
Frequently Asked Questions
Use a veterinary ear-cleaning solution made for dogs, plus cotton balls or gauze. That's it. Skip homemade mixes, hydrogen peroxide, rubbing alcohol, and vinegar, which sting inflamed skin and can damage the canal. If you're out of cleaner, wait and buy the proper product rather than improvising.
Flood the canal with dog ear cleaner, massage the ear base to break the debris loose, let your dog shake, then wipe the gunk from the outer canal with a cotton ball. Heavy, dark, smelly buildup that keeps coming back is usually an infection or mites, not just wax, and that needs a vet rather than more scrubbing.
It's best not to. Both are common home remedies, but on raw or inflamed ear skin they sting and can irritate the delicate canal, and leftover moisture actually feeds yeast. A proper dog ear cleaner contains a drying agent and is formulated for the ear's pH, which is why vets recommend it instead.
Most dogs need it only occasionally, maybe monthly, and some healthy ears almost never. Floppy-eared breeds, swimmers, and allergic dogs usually need it more often. Over-cleaning a healthy ear can irritate it and trigger problems, so clean when the ear looks dirty, not on a rigid schedule.
Only on the visible outer parts, never down inside the canal. A dog's ear canal makes an L-shaped bend, and a cotton swab pushes debris deeper and can damage the eardrum. Let the cleaning solution and your dog's own head shake do the deep work, and use cotton balls for the wiping.